Here’s the steps:
We have provided some sample contents inside “sample-data” directory which comes with your theme package. You have to import those contents.
Importing Contents
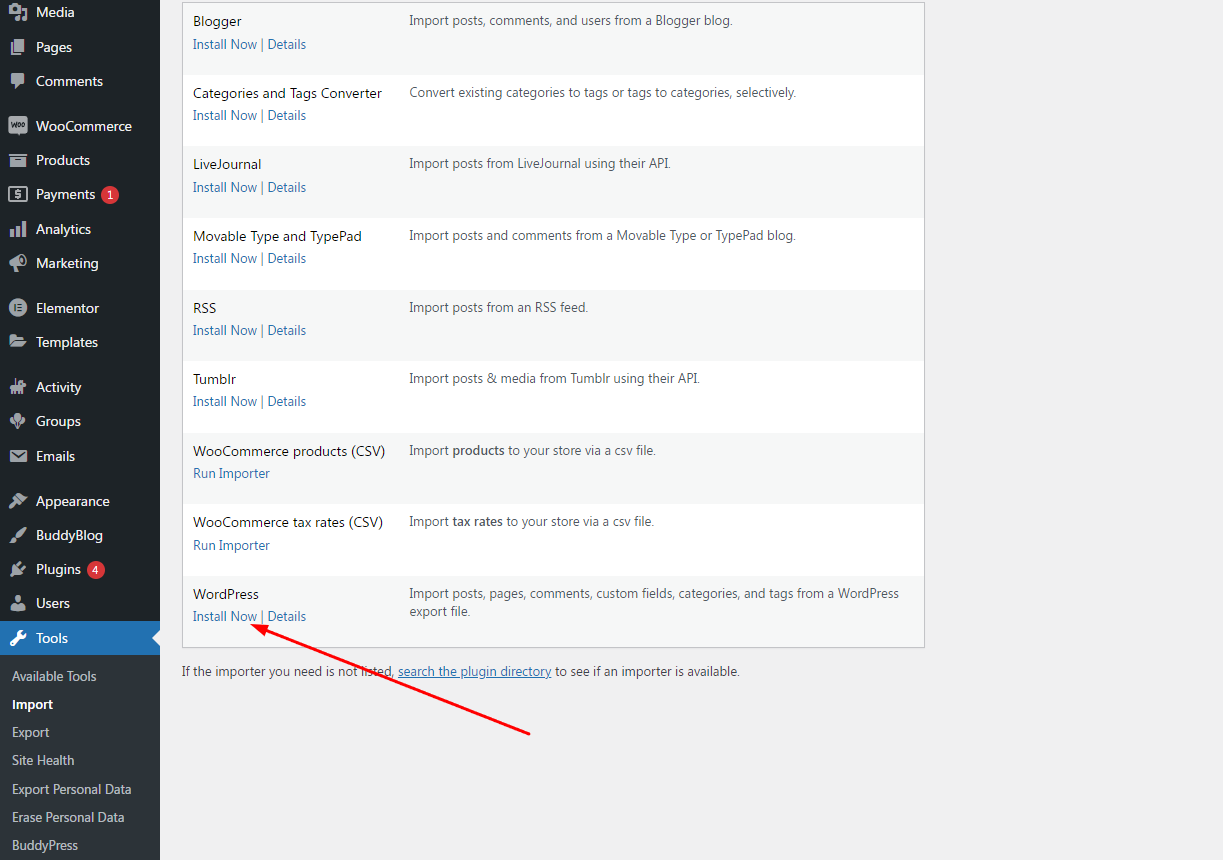
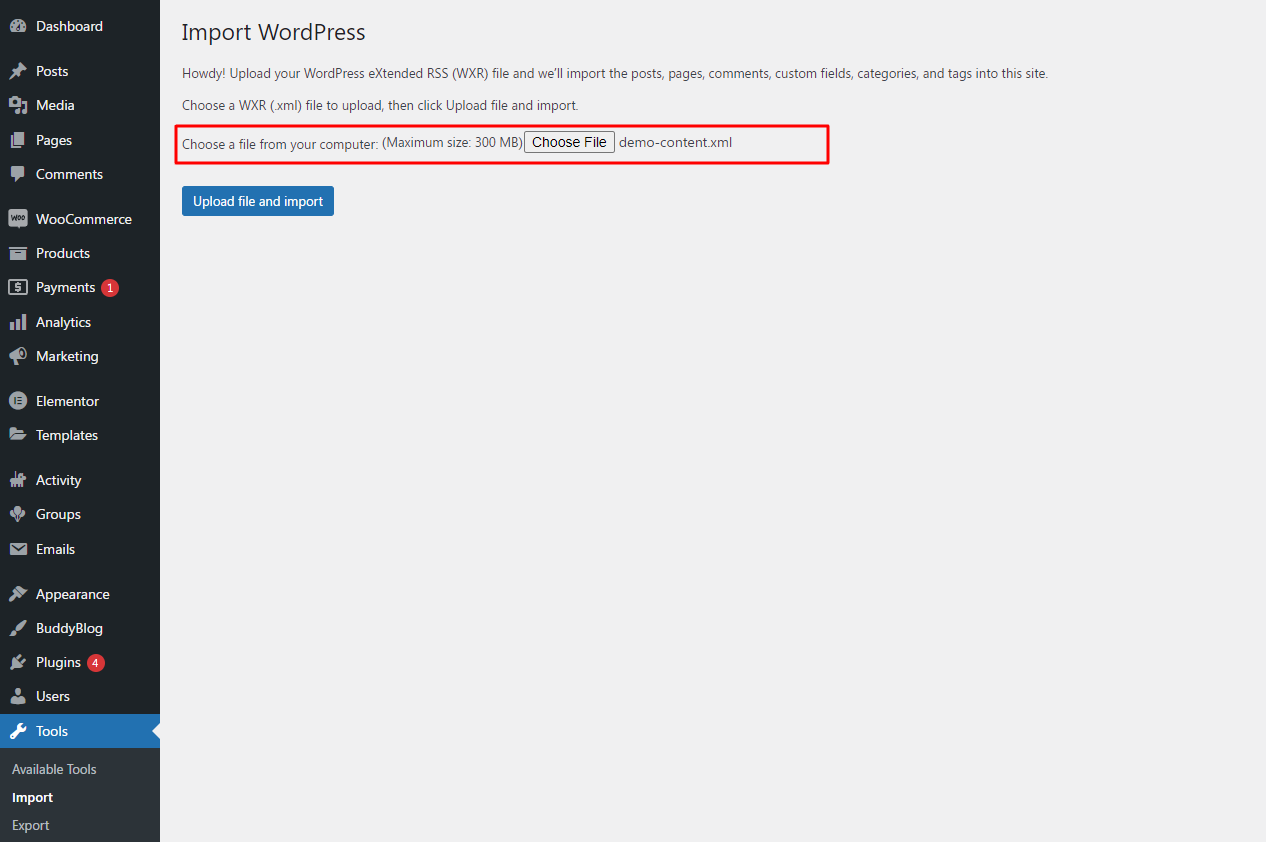
From Admin menu, navigate to Tools->Import. From there select the “WordPress” and then run the importer(It will ask you to install the importer before if this is your first time). In the next step when file uploading option appears, select the “demo-content.xml” file from sample-data and start uploading. In next step select the checkbox saying “Download and import file attachments” and click on “Submit”. Then it’ll start uploading contents eg. pages, posts etc.
Importing Widgets
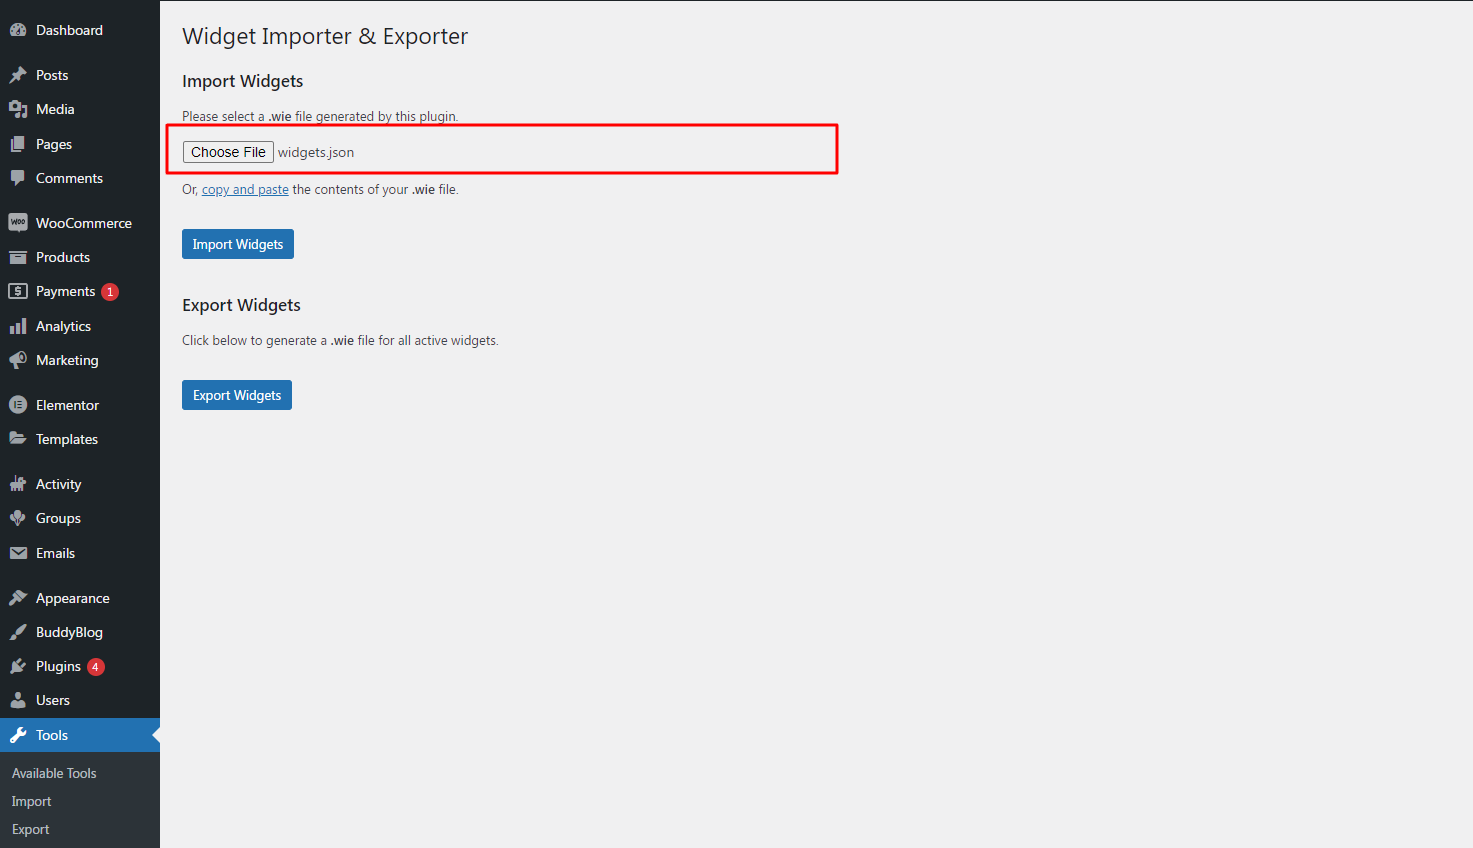
You can import widgets using plugin Widget Importer & Exporter. After installing this plugin, navigate to Tools->Widget Importer & Exporter. In the next step when file uploading option appears, select the “widgets.wie” file from sample-data and start importing.
Importing options
You can import options using plugin Customizer Export/Import. After installing this plugin, Go to pannel from Admin menu, navigate to Appearance -> Customize, then go to Export/Import tab. From there click on “Choose file” option. Then Select the “customizer.dat” form your downloaded theme directory and check the Download and import image files? check box then finally hit on “Import” button. Follow the below screenshot steps.

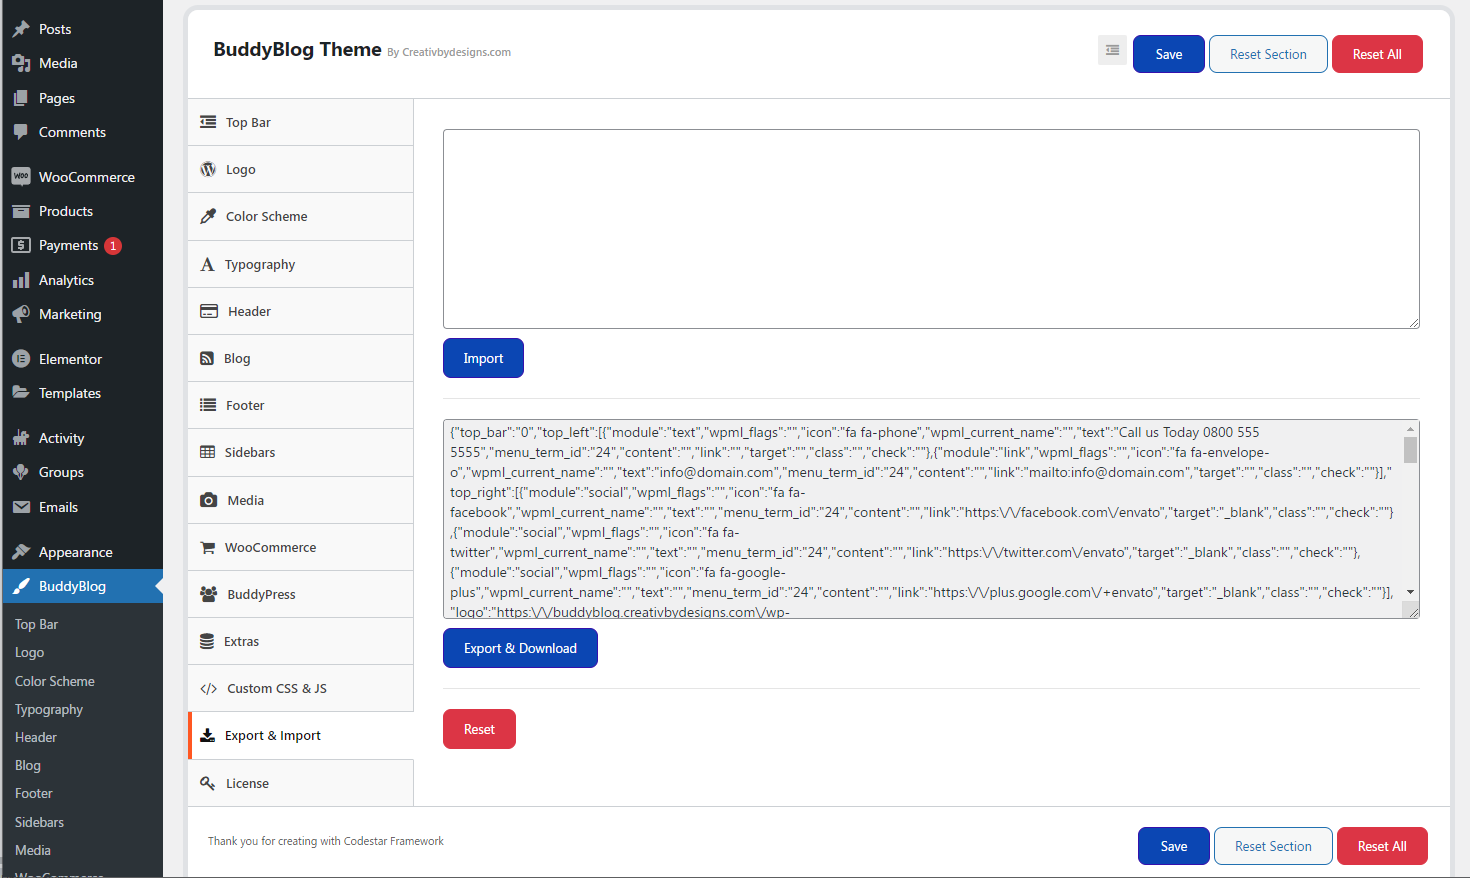
Importing Them Option
After installing this plugin, Go to pannel from Admin menu, navigate to BuddyBlog then go to Export/Import tab. From there click on “Choose file” option. Then Select the “theme-option.txt” form your downloaded theme directory and check the Download and import image files? check box then finally hit on “Import” button. Follow the below screenshot steps.